 We are launching a series of behind the scenes information articles and this first series is based on “How to make great event videos.” Whether you are shooting a convention, seminar, workshop, or launch party, event videos are some of the most challenging – exciting – videos you can make. Of course, a great video is built upon great foundations.
INSIDER TIP #2: Take the right gear.
CAMERAS
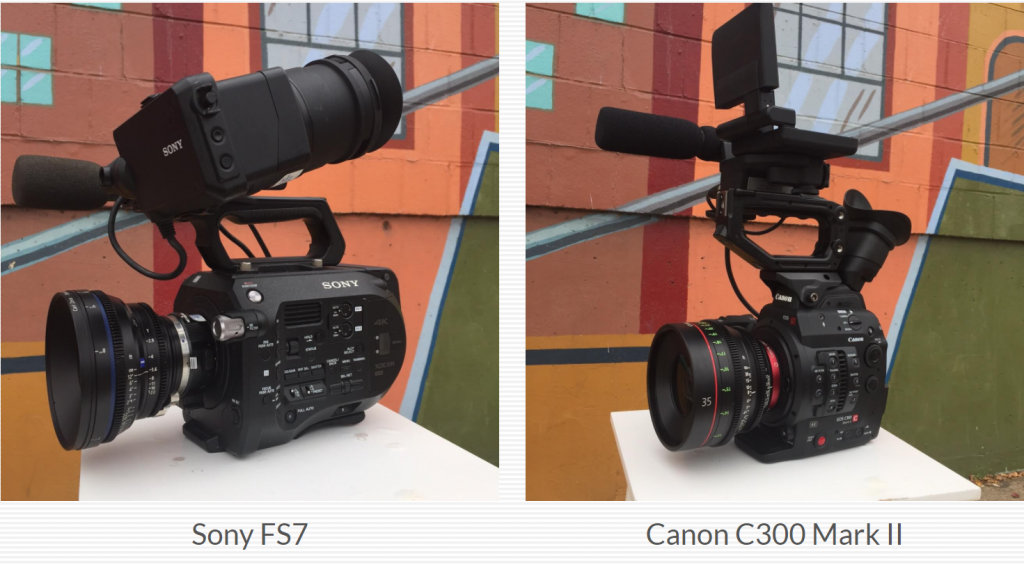
On most of our event videos, we currently use one of the following two cameras: the Canon C300 Mark II or the Sony FSY. The different camera shapes will jump at you right away. When shooting handheld (without tripods or other camera supports), the Sony sits nicely on your shoulder or rests gently against your chest. On the other hand, the Canon is a bit boxier, a bit trickier to hold. That said, this also makes it a lot easier to mount to camera supports. We´ll get into those supports shortly, but for now, check out this video comparison between the Sony Fs/ to the Canon C300 Mark II. If you want to skip all the fluff about camera buttons and controls, then jump directly to minute 9:09 to see the image comparisons.
You´ll see that according to the review, the Canon wins on image quality while the Sony wins in Slow Motion shooting. Of course, other reviewers will have different opinions. At Stark Crew, we have used both cameras very successfully in all kinds of situations.
CAMERA SUPPORTS
-TRIPODS The support most people are familiar with is the tripod, which is the three-legged beast that holds the camera still in one location. Even though the camera is fixed in one position, the camera can still move through vertical movements known as tilts and horizontal movements called pans. You can tilt up and down; you can pan left and right. But don´t think because the movements are few, that they are cheap. Pricing all comes down to the quality of the tripod material, especially the “head” piece that moves around. Buying a tripod with the best and smoothest movement possible can easily run you up to $16,000! You can see what I mean right here.
-SLIDERS Sliders permit the camera to flow left and right on a track, giving the viewer the effect of standing on a moving walkway and moving along with the action. In the context of events, we find that sliders give a very cinematic and engaging look to your film, especially when shooting close-ups of items or wide shots of rooms. We also sometimes use them during interviews for a fresh and interesting effect. Here´s a quick overview video about sliders:
– GLIDECAMS & GIMBALS Glidecams and Gimbals allow cameras to float around as if the videographer were a ghost! You can float up staircases or mountainsides with no jerkiness of motion. While Glidecams are non-electric, gimbals run on motors. You can see an easy comparison in the video below.
-DRONES Wanna get high? Time to get droned! Drones are mainly used for big, epic, cinematic overhead shots – although if the space is big enough, you can use them inside buildings as well. At Stark Crew, we have used drones to follow trucks along the highway, factory facilities, and the interior of a factory with sparks flying, just to name a few uses.
MICROPHONES
-BUILT-IN MICROPHONES: While most cameras have a built-in microphones (just like your computer or mobile phone) they are not recommended for professional sound recording. Built-in microphones are omnidirectional, meaning that all noise from all directions is recorded. In other words, this microphone gives the same attention to the person speaking in front if you as it does to the cars passing behind you in the street. The result is that recordings are full of distracting noise and static.  They can be used if audio quality does not matter. For example, if you are shooting consumer research videos with random people in the street and interviewing them as to what they think about ecological soap. Usually the audience for this kind of video are your own internal marketing people, so the audio quality really doesn´t matter. The content – the actual answers that the interviewees give – matters much more than the audio quality. Another use for this type of audio is as a guide so that editors can start editing the video, but later on they will delete the built-in microphone track and replace with with separate, independentally recorded audio.
-SHOTGUN MICROPHONES: While built-in mics are omnidirectional, shotgun mics are directional. This means they record audio mainly from the direction in which you point them, which is why they are great for interviewing someone. There are essentially three ways to mount shotgun microphones:
 1) On the camera itself. This is a good choice for a videographer that has to run around and do interviews with random people on the fly.
2) On a stand. This is a good option for a fixed interviewee who does not move.
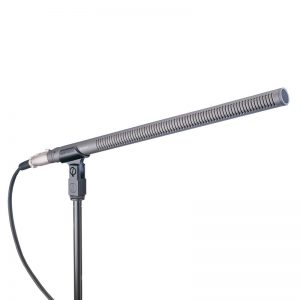
3) On a boom pole that is being controlled by a person. This is a good option for multiple interviewees or interviewer + interviewee.The boom controller can manually point the microphone in the direction of the person who is currently speaking.
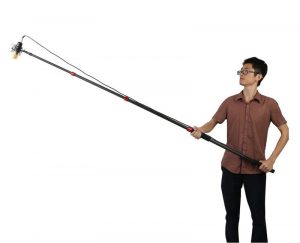
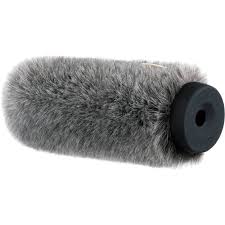
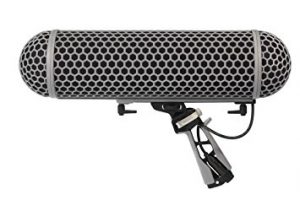
Not only do shotgun microphones deal with movement fairly well, but they also do well in windy situations when covered with a simple wind guard.
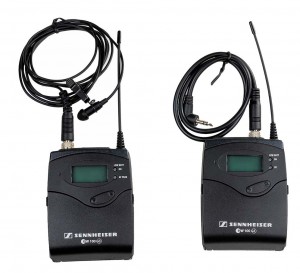
-LAVALIER MICROPHONES: Many experts will tell you that whenever possible, use a lavalier or clip-on microphone for interviews. As with any audio recording, the closer you get the the source of the sound, the better. Lavalier microphones, being clipped to the interviewee´s shirt or lapel, are about as close as you can get! As these microphones are so close to the mouth, you can avoid a lot of the background noise which does not get picked up. These are also great microphones when you have to interview multiple people, as any number of lavalier microphones can be put on any number of people to record them all simultaneously. The issue with lavalier mics is that you really need a closed, controlled location because these microphones do not deal with wind or moving subjects very well. Also, it´s not always easy or possible to hide lavalier microphones behind clothing, so if it is imperative that the microphone be invisible, then lavalier microphones may not be the right choice.
AUDIO MIXERS & RECORDING DEVICES

Audio mixers are also known as Portable Field Sound Devices and by other names, but in short, they are mixers that control the audio signals. There are basically two main concepts for recording audio with these devices: a 1 system setup or a 2 system setup. In a 1 system setup, the audio flows from the microphone through the mixer and then into the camera itself. This is called recording direct-to-camera. The same camera that is recording the image is also recording the sound, In a 2 system setup, the audio flows from the microphone through the mixer and then into an independent audio recording device. The camera that is recording the image is NOT simultaneously recording the sound. Depending on the type of camera we are using and the dynamics of the shoot, we will employ a 1 or 2 system audio solution. As a rule, if the camera has professional XLR audio inputs (we don´t trust mini-jack inputs as they often break) and we need to record two audio channels (two microphones) or less, then we´ll use a 1 system setup. But if we are recording more than two channels of audio, we´ll likely use a 2 system setup. Keep in mind that, whichever system we use, we are not directly recording from the microphone straight into a recording device, be it the camera or a separate audio recorder. The audio must always pass through a mixing device. This is where we modify high, mid, and low frequencies, gain, and other audio controls in order to give interviewees the best “radio voice” we can.
LIGHTS
At Stark Crew, we tend to use LED lights at events. A light-emitting diode (LED) is a two-lead semiconductor light source. When a suitable current is applied to the leads, electrons are able to recombine with electron holes within the device, releasing energy in the form of photons. At events, we usually expect two different situations: 1) situations where we have a space to set up proper interviews and 2) situations where we are roaming around and “people wrangling” or asking people randomly if we can interview them. In situations where we can set up our own lights, we´ll set up a space where we can work with the various light sources which sometimes includes mixing our lights with the venues light + daylight, as you can see in the video below. https://www.youtube.com/watch?v=v0vjXNOYQx4&t=106s In situations when we are running around and “people-wrangling” for interviews, we´ll often take a small LED light. Even though small LEDs can be attached directly to the top of the camera, we usually have a production assistant hold it off to the side to avoid annoying the interviewee. You can see what we mean in the video below.
In addition to all of the gear items above, we also often take many more items to a shoot: video monitors, cables, even walkie-talkies, but this is the core of it all.
If you do not yet have a budget and are trying to figure out the cost of the best crew and gear package, we can give you an immediate quote. Or, if you have a fixed budget, then let us know your budget range and we will give you the best options possible. We can often get creative even with smaller budgets in order to provide cinematic event videos. Ready to get started? Contact us now.
You can see some of the event videos we have done for customers of ours such as Facebook, Instagram, and Uber, on our portfolio page.
