 If there is one thing that will ruin an awesome-looking video, it is bad sound. While imperfections in the video itself can often be fixed in post-production, nothing – NOTHING – can fix bad audio.
Yet, some people find themselves in these hopeless situations with no way to fix their videos.
In this article, we´ll let you know how to avoid getting put into a bad audio situation!
To start, check out the video below which compares good and bad audio. Which situation would you like to be in?
Big difference, right? Here´s how you can make sure to record great audio:
REMEMBER: Bad audio happens when in order save money, professional sound technicians with professional sound equipment are cut from videos crews.
FOCUS ON CLEAN AUDIO
In our previous article on selecting the correct crew size for an event video, we talked about focus:
“If only one person is expected to be responsible for both the image and audio, as well as for interviewing people, they just have too much on their plate. They are not going to notice that the microphone is crackling or that your interviewee has mustard on her shirt. Everyone has a specific job to do.”
You need one person who is 110% focused on the audio alone. Video productions are intense and busy places; the producer, director, videographer, and other crew members, all have their own jobs to do and will not always notice audio problems such as phones ringing, car noise and sirens from the street outside, heavy breathing, crackling sounds, static, and about a million other things that can go wrong with audio.
A professional audio technician is exclusively dedicated to making sure that the audio is clean and clear. He or she will not be afraid to stop the production if there is any kind of noise interference and take the necessary steps to remove or avoid these kinds of sound issues. After all, allowing an ambulance siren to blare during an interview renders the footage completely useless. So to record great audio, make sure a dedicated sound tech is on the crew.
FOCUS ON SOUND QUALITY
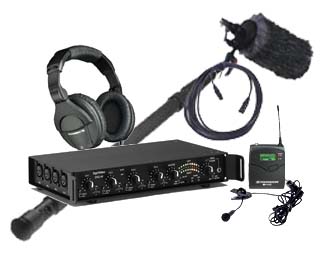
One of the crucial responsibilities of a professional sound tech is bringing the right gear. Because anything can happen on set, a pro sound tech will have microphones and accessories to deal with any kind of audio situation. Also, you´re going to want a your interviews to have a clear, compressed, and well-mixed “radio voice” without cracking, rubbing, or wind noise. Not only will the sound tech have a portable mixer to mix and compress the audio to get that “radio voice” sound, but he or she will also have an assortment of accessories to block wind noise and other interferences.
It´s interesting that so much attention is given to video quality over audio quality, when in fact if you had to choose one over the other, audio quality would win hands down. You can see this demonstrated in the video below:
In case you´d like to dive a bit deeper into gear, below is a quick overview:
MICROPHONES
 -BUILT-IN MICROPHONES: While most cameras have built-in microphones (just like your computer or mobile phone) they are not recommended for professional sound recording. Built-in microphones are omnidirectional, meaning that all noise from all directions is recorded. In other words, this microphone gives the same attention to the person speaking in front of you as it does to the cars passing behind you in the street. The result is that recordings are full of distracting noise and static. They can be used if audio quality does not matter. For example, if you are shooting consumer research videos with random people in the street and interviewing them as to what they think about ecological soap. Usually, the audience for this kind of video is your own internal marketing people, so the audio quality really doesn´t matter. The content – the actual answers that the interviewees give – matters much more than the audio quality. Another use for this type of audio is as a guide so that editors can start editing the video, but later on, they will delete the built-in microphone track and replace with separate, independently recorded audio.
 -SHOTGUN MICROPHONES: While built-in mics are omnidirectional, shotgun mics are directional. This means they record audio mainly from the direction in which you point them, which is why they are great for interviewing someone. There are essentially three ways to mount shotgun microphones:
1) On the camera itself. This is a good choice for a videographer that has to run around and do interviews with random people on the fly.
2) On a stand. This is a good option for a fixed interviewee who does not move.
3) On a boom pole that is being controlled by a person. This is a good option for multiple interviewees or interviewer + interviewee.The boom controller can manually point the microphone in the direction of the person who is currently speaking.
Not only do shotgun microphones deal with movement fairly well, but they also do well in windy situations when covered with a simple wind guard.
 -LAVALIER MICROPHONES: Many experts will tell you that whenever possible, use a lavalier or clip-on microphone for interviews. As with any audio recording, the closer you get the source of the sound, the better. Lavalier microphones, being clipped to the interviewee´s shirt or lapel, are about as close as you can get! As these microphones are so close to the mouth, you can avoid a lot of the background noise which does not get picked up. These are also great microphones when you have to interview multiple people, as any number of lavalier microphones can be put on any number of people to record them all simultaneously. The issue with lavalier mics is that you really need a closed, controlled location because these microphones do not deal with wind or moving subjects very well. Also, it´s not always easy or possible to hide lavalier microphones behind clothing, so if it is imperative that the microphone be invisible, then lavalier microphones may not be the right choice.
AUDIO MIXERS & RECORDING DEVICES
 Audio mixers are also known as Portable Field Sound Devices and by other names, but in short, they are mixers that control the audio signals. There are basically two main concepts for recording audio with these devices: a 1 system setup or a 2 system setup. In a 1 system setup, the audio flows from the microphone through the mixer and then into the camera itself. This is called recording direct-to-camera. The same camera that is recording the image is also recording the sound, In a 2 system setup, the audio flows from the microphone through the mixer and then into an independent audio recording device. The camera that is recording the image is NOT simultaneously recording the sound. Depending on the type of camera we are using and the dynamics of the shoot, we will employ a 1 or 2 system audio solution. As a rule, if the camera has professional XLR audio inputs (we don´t trust mini-jack inputs as they often break) and we need to record two audio channels (two microphones) or less, then we´ll use a 1 system setup. But if we are recording more than two channels of audio, we´ll likely use a 2 system setup. Keep in mind that, whichever system we use, we are not directly recording from the microphone straight into a recording device, be it the camera or a separate audio recorder. The audio must always pass through a mixing device. This is where we modify high, mid, and low frequencies, gain, and other audio controls in order to give interviewees the best “radio voice” we can.
Want to record professional audio on your next video? Contact us now for a free consultancy.